徹底的に影を自在にコントロールしてみる
前回、ウィンドウのスクリーンショットに自分好みの影を付けるdropshadowコマンド作った。どうにか、影なしウィンドウのスクリーンショットに対しては、好みの影を付けられるようになった。満足している。ところが、すでに影のあるスクリーンショットに対して実行するとどうなるか?
| 元画像 | dropshadow |
|---|---|
 |
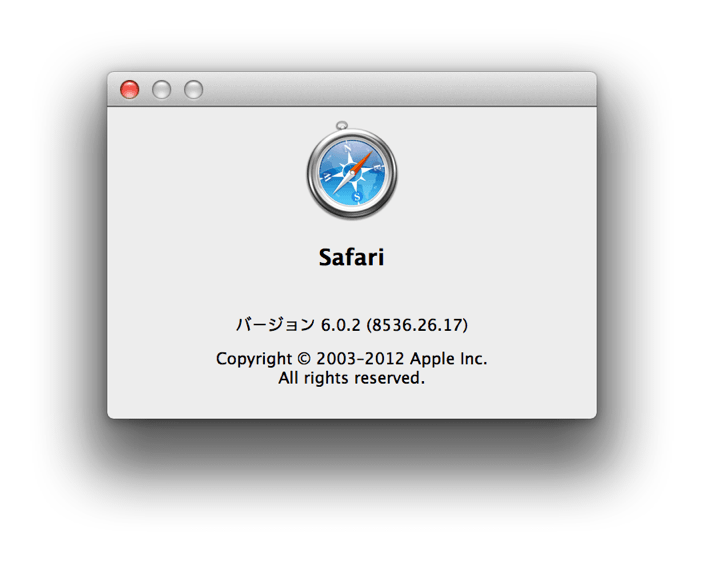 |
全然ダメ...。影付き画像は影が小さくならないばかりか、影の濃度が倍の濃さになってしまっている。これは、元画像の影が残った状態で再描画しているので、影が二重に上塗りされてしまったためと思われる。一方、MiniShadowではどうなるかというと...
| 元画像 | MiniShadow |
|---|---|
 |
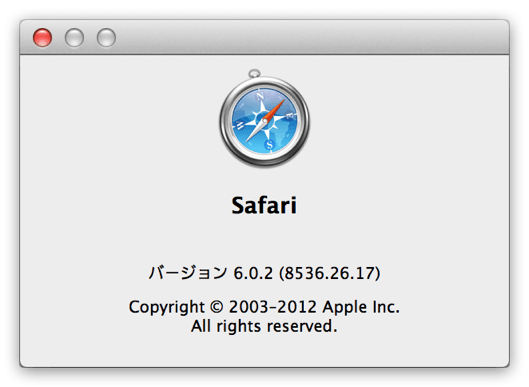 |
しっかり影の部分が縮小されている!さすがMiniShadow、素晴らしい仕事をしている。では、MiniShadowのように影を自由にコントロールするためには、自分には何が足りないのだろう?おそらく、影の部分を削除してから再描画する必要があるのだと思う。周囲の影を切り取って、いったん影なしの画像にしてしまえば、あとの処理は今までと同じでよいはず。さっそく作業開始!
影の部分を切り抜く作戦
- しかし、周囲の影だけをきれいに切り抜くメソッドなんて用意されているのだろうか?
- NSImageのメソッド一覧をながめても、それらしきメソッド名は見つからない...。
- 影は簡単に投影できるのに、影を削除することはできないのだろうか?
- 自分なりに調べてみたが、やはり見つからない。
- よって、都合よく影を削除するメソッドはないのだと思うことにした。
- でもMiniShadowはきっちり影の部分を削除している。
- さらに、今時のPhotoshop、いやプレビュー.appでさえ、影程度なら簡単に削除してくれる。
- その中では、どうやっているのだろう?
- 考えてみたが、自分の頭では画期的な方法は思いつかない。
- ここはもう、地道に1ピクセルごとの情報を調べるしかないと思った。
- この作業によって求めた対角座標でクリッピングすれば、影の部分のみ削除できるはずだ。
- しかし、今時の高度に発達した複雑怪奇なGPU管理のグラフィック情報を、1ピクセルごとに調べる方法なんてあるのだろうか?
同じことを、今時のMacBook環境でやりたいのだ。果たしてできるのか?
1ピクセルごとの色情報を調べる
- 調べてみると、1ピクセルごとの情報は取得可能だった!
- NSBitmapImageRepにcolorAtX:y: メソッドを発見した。
NSColor *color = [imageRep colorAtX:x y:y];
- これで指定した座標のピクセルカラーが取得できる!
- こうなったら地道にやるしかない。
- 工夫のないコードだが、とりあえずトリミングを目指してみた。
//

 //  main.m

 //  dropshadow

 //

 //  Created by zarigani on 2012/11/13.

 //  Copyright (c) 2012年 bebe工房. All rights reserved.

 //


 #import <Cocoa/Cocoa.h>


 // 左側の境界座標を返す

 NSInteger trimLeft(NSBitmapImageRep *imageRep)

 {

     for (int x=0; x<imageRep.pixelsWide; x++) {

         for (int y=0; y<imageRep.pixelsHigh; y++) {

             NSColor *color = [imageRep colorAtX:x y:y];

             if ([color alphaComponent] >= 1.0) return x;

         }

     }

     return 0;

 }


 // 右側の境界座標を返す

 NSInteger trimRight(NSBitmapImageRep *imageRep)

 {

     for (NSInteger x=imageRep.pixelsWide - 1; x>=0; x--) {

         for (NSInteger y=0; y<imageRep.pixelsHigh; y++) {

             NSColor *color = [imageRep colorAtX:x y:y];

             if ([color alphaComponent] >= 1.0) return (x + 1);

         }

     }

     return 0;

 }


 // 上側の境界座標を返す

 NSInteger trimTop(NSBitmapImageRep *imageRep)

 {

     for (NSInteger y=0; y<imageRep.pixelsHigh; y++) {

         for (NSInteger x=0; x<imageRep.pixelsWide; x++) {

             NSColor *color = [imageRep colorAtX:x y:y];

             if ([color alphaComponent] >= 1.0) return (imageRep.pixelsHigh - y);

         }

     }

     return 0;

 }


 // 下側の境界座標を返す

 NSInteger trimBottom(NSBitmapImageRep *imageRep)

 {

     for (NSInteger y=imageRep.pixelsHigh - 1; y>=0; y--) {

         for (NSInteger x=0; x<imageRep.pixelsWide; x++) {

             NSColor *color = [imageRep colorAtX:x y:y];

             if ([color alphaComponent] >= 1.0) return (imageRep.pixelsHigh - 1 - y);

         }

     }

     return 0;

 }


 // 指定した透明度以上の領域を含む最小のrectを返す

 NSRect trimRectFromImageByAlphaValue(NSImage *image, int limit)

 {

     NSBitmapImageRep* imageRep = [NSBitmapImageRep imageRepWithData:[image TIFFRepresentation] ];

     // スケールを取得する  // NSLog(@"scale = %f", scale);  //例 Retina scale = 2.000000

     CGFloat scale = [ [NSScreen mainScreen] backingScaleFactor];


     NSRect trimRect = NSZeroRect;

     trimRect.origin.x = (float)trimLeft(imageRep)/scale;

     trimRect.origin.y = (float)trimBottom(imageRep)/scale;

     trimRect.size.width = (float)trimRight(imageRep)/scale - trimRect.origin.x;

     trimRect.size.height = (float)trimTop(imageRep)/scale - trimRect.origin.y;


 //    NSLog(@"%f, %f, %f, %f", trimRect.origin.x, trimRect.origin.y, trimRect.size.width, trimRect.size.height);

     return trimRect;

 }


 // 指定した範囲に画像を切り取って返す

 NSImage* trimImageByRect(NSImage *image, NSRect trimRect)

 {

     //スケールを取得する

     CGFloat scale = [ [NSScreen mainScreen] backingScaleFactor];

     //Retina環境に応じたポイントサイズを取得する

     NSBitmapImageRep* imageRep = [NSBitmapImageRep imageRepWithData:[image TIFFRepresentation] ];

     NSSize pointSize = NSMakeSize(imageRep.pixelsWide/scale, imageRep.pixelsHigh/scale);

     //解像度を統一する(画像によって72dpiと144dpiの2つの設定があるので)

     [image setSize:pointSize];

     //描画する場所を準備

     NSRect newRect = NSZeroRect;

     newRect.size = trimRect.size;

     NSImage *newImage = [ [NSImage alloc] initWithSize:newRect.size];

     //描画する場所=newImageに狙いを定める、描画環境を保存しておく

     [newImage lockFocus];

     [NSGraphicsContext saveGraphicsState];

     //拡大・縮小した時の補間品質の指定

     [ [NSGraphicsContext currentContext] setImageInterpolation:NSImageInterpolationHigh];

     //描画する

     [image drawAtPoint:NSZeroPoint fromRect:trimRect operation:NSCompositeSourceOver fraction:1.0];

     //描画環境を元に戻す、描画する場所=newImageから狙いを外す

     [NSGraphicsContext restoreGraphicsState];

     [newImage unlockFocus];


     return newImage;

 }
- 上記までが追加したコード。影の部分を無視して、ウィンドウを含む最小のrectにトリミングする。
- 以下はほとんど変更なし。main関数内のみ、上記トリミングに関する処理の実行を追加している。
// 影付きイメージを描画して返す

 NSImage* dropshadowImage(NSImage *image, float blurRadius, float alphaValue)

 {

     float margin = blurRadius * 1.25;

     //スケールを取得する

     CGFloat scale = [ [NSScreen mainScreen] backingScaleFactor];

     //Retina環境に応じたポイントサイズを取得する

     NSBitmapImageRep* imageRep = [NSBitmapImageRep imageRepWithData:[image TIFFRepresentation] ];

     NSSize dotSize = NSMakeSize(imageRep.pixelsWide/scale, imageRep.pixelsHigh/scale);

     //描画する場所を準備

     NSRect newRect = NSZeroRect;

     newRect.size.width = dotSize.width + margin*2;

     newRect.size.height = dotSize.height + margin*2;

     NSImage *newImage = [ [NSImage alloc] initWithSize:newRect.size];

     //描画する場所=newImageに狙いを定める、描画環境を保存しておく

     [newImage lockFocus];

     [NSGraphicsContext saveGraphicsState];

     //拡大・縮小した時の補間品質の指定

     [ [NSGraphicsContext currentContext] setImageInterpolation:NSImageInterpolationHigh];

     //影の設定

     NSShadow *shadow = [ [NSShadow alloc] init];

     [shadow setShadowOffset:NSMakeSize(0.0, -blurRadius * 0.25)];

     [shadow setShadowBlurRadius:blurRadius];

     [shadow setShadowColor:[ [NSColor blackColor] colorWithAlphaComponent:alphaValue] ];

     [shadow set];

     //描画する

     NSRect drawRect;

     drawRect.origin = NSMakePoint(margin, margin);

     drawRect.size = dotSize;

     [image drawInRect:drawRect

              fromRect:NSZeroRect

             operation:NSCompositeSourceOver

              fraction:1.0

        respectFlipped:YES

                 hints:nil];

     //描画環境を元に戻す、描画する場所=newImageから狙いを外す

     [NSGraphicsContext restoreGraphicsState];

     [newImage unlockFocus];


     return newImage;

 }


 // PNGファイルとして保存する

 void saveImageByPNG(NSImage *image, NSString* fileName)

 {

     NSData *data = [image TIFFRepresentation];

     NSBitmapImageRep* bitmapImageRep = [NSBitmapImageRep imageRepWithData:data];

     NSDictionary* properties = [NSDictionary dictionaryWithObject:[NSNumber numberWithBool:YES]

                                                            forKey:NSImageInterlaced];

     data = [bitmapImageRep representationUsingType:NSPNGFileType properties:properties];

     [data writeToFile:fileName atomically:YES];

 }


 int main(int argc, char * argv[])

 {


     @autoreleasepool {

         int opt, i;

         float blurRadius = 8.0;

         float alphaValue = 0.5;


         //opterr = 0;/* エラーメッセージを非表示にする */


         while((opt = getopt(argc, argv, "a:b:")) != -1){

             switch(opt){

                 case 'a':

                     sscanf(optarg, "%f", &alphaValue);

                     printf("  Option -%c = %f\n", opt, alphaValue);

                     break;


                 case 'b':

                     sscanf(optarg, "%f", &blurRadius);

                     printf("  Option -%c = %f\n", opt, blurRadius);

                     break;


                     // 解析できないオプションが見つかった場合は「?」を返す

                     // オプション引数が不足している場合も「?」を返す

                 case '?':

                     printf("Unknown or required argument option -%c\n", optopt);

                     printf("Usage: dropshadow [-a ALPAH_VALUE(0-1)] [-b BLUR_RADIUS(0<)] FILE ...\n");

                     printf("Example:\n");

                     printf("    dropshadow test.png       ->  Default shadow(= dropshadow -a 0.5 -b 8 test.png)\n");

                     printf("    dropshadow -b 2 test.png  ->  Outline only\n");

                     return 1;

             }

         }


         for(i = optind; i < argc; i++){

             // ファイルパスをパースしておく

 //            NSString *aPath = @"~/a/b/c.d.e";

             NSString *aPath = [NSString stringWithUTF8String:argv[i] ];

             NSString *fPath = [aPath stringByStandardizingPath];        // /Users/HOME/a/b/c.d.e

 //          NSString *fDir = [fPath stringByDeletingLastPathComponent]; // /Users/HOME/a/b

 //          NSString *fNameExt = [fPath lastPathComponent];             // c.d.e

             NSString *fExt = [fPath pathExtension];                     // e

             NSString *fDirName = [fPath stringByDeletingPathExtension]; // /Users/HOME/a/b/c.d

 //            NSLog(@"name.ext=%@  ext=%@  dir=%@  dir/name=%@", fNameExt, fExt, fDir, fDirName);

             NSString *shadowPath = [ [fDirName stringByAppendingString:@"-shadow."] stringByAppendingString:fExt];


             NSImage *image = [ [NSImage alloc] initWithContentsOfFile:fPath];


             // 影の領域を削除した画像にする

             NSRect trimRect = trimRectFromImageByAlphaValue(image, 255);

             NSImage *trimImage = trimImageByRect(image, trimRect);

             // 影付きイメージを生成する

             NSImage *shadowImage = dropshadowImage(trimImage, blurRadius, alphaValue);

             // PNG画像として保存する

             saveImageByPNG(shadowImage, shadowPath);

             // 画像情報を出力する

             NSRect align = [shadowImage alignmentRect];

             NSLog(@"%@ (%f, %f, %f, %f)", shadowPath, align.origin.x, align.origin.y, align.size.width, align.size.height);

         }

     }

     return 0;

 }
- さっそく試してみる。ビルドして実行してみると、影付きウィンドウもこのようになった!嬉しい!
| 元画像 | dropshadow |
|---|---|
 |
 |
残った影を完全に消す作戦
- やった、これでMiniShadowにも引けを取らないコマンドになったと思ったのも束の間、
- 以前から気になっていた部分が、さらに気になり始めた...。
- それは、影付きウィンドウの影の領域を縮小した時に、四隅に黒い点が残ってしまうこと。
- 小さくて分かり難いので、拡大表示してみる。
- このような黒い点が、四隅のコーナーの部分に4か所残ってしまっているのだ。
- 原因は角が丸まっているため。四角いトリミングをしていては、どうしても影が残ってしまうのだ...。
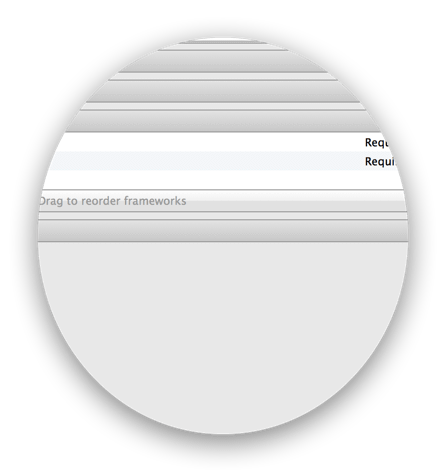
- 極端な例で考えれば、影付きの丸いウィンドウがあったとして、それをdropshadowするとこうなる。
| 元画像 | dropshadow |
|---|---|
 |
[ .5] .5] |
- 全然納得できない、怪しい影になってしまう。
- これは、MiniShadowでも同じ結果になる...。
- つまり、四角いトリミングに頼っている点では、どちらも仕組みは同じなのだ。
- この問題を解決してこそ、完璧に影をコントロールしていると言える。
- 自分なりに考えてみたが、やはり地道に1ピクセルごとに見ていくしかないと思った。
- すべてのピクセルをチェックして、もし少しでも透明なピクセルが見つかったら、
- そのピクセルは影と見なして、透明度0の完全に透明なピクセルに置き換えてしまう。
- そうすれば、トリミングして残った影も完全に消えるはず。
- 前提条件として、少しでも透明なピクセルはすべて影と見なして問題ない画像にしか使えない。
- これでうまく行ったら、透明度のレベルを調整可能にしても良いかもしれない。
- そのように考えて追加したのが以下のコードである。
// 指定した値より透明なピクセルを透明度0(透過率100%)にした画像を返す

 //      setColorは処理が遅い、よって巨大な画像では時間がかかる

 NSImage* transparentImageByAlphaValue(NSImage* image)

 {

     NSBitmapImageRep* imageRep = [NSBitmapImageRep imageRepWithData:[image TIFFRepresentation]];

     NSColor *clearColor = [NSColor colorWithCalibratedRed:0.0 green:0.0 blue:0.0 alpha:0.0];

     for (int y=0; y<imageRep.pixelsHigh; y++) {

         for (int x=0; x<imageRep.pixelsWide; x++) {

             NSColor *color = [imageRep colorAtX:x y:y];

             if ([color alphaComponent] < 1) {

 //                NSLog(@"(%i, %i) %f", x, y, [color alphaComponent]);

                 [imageRep setColor:clearColor atX:x y:y];

             }

         }

     }

     CGImageRef cgimage = [imageRep CGImage];

     NSImage *transparentImage = [[NSImage alloc] initWithCGImage:cgimage size:NSZeroSize];

     return transparentImage;

 }
- main関数にも上記の処理を追加した。
...中略...

for(i = optind; i < argc; i++){

             // ファイルパスをパースしておく

 //            NSString *aPath = @"~/a/b/c.d.e";

             NSString *aPath = [NSString stringWithUTF8String:argv[i]];

             NSString *fPath = [aPath stringByStandardizingPath];        // /Users/HOME/a/b/c.d.e

 //          NSString *fDir = [fPath stringByDeletingLastPathComponent]; // /Users/HOME/a/b

 //          NSString *fNameExt = [fPath lastPathComponent];             // c.d.e

             NSString *fExt = [fPath pathExtension];                     // e

             NSString *fDirName = [fPath stringByDeletingPathExtension]; // /Users/HOME/a/b/c.d

 //            NSLog(@"name.ext=%@  ext=%@  dir=%@  dir/name=%@", fNameExt, fExt, fDir, fDirName);

             NSString *shadowPath = [[fDirName stringByAppendingString:@"-shadow."] stringByAppendingString:fExt];


             NSImage *image = [[NSImage alloc] initWithContentsOfFile:fPath];


             // 影の領域を削除した画像にする

             NSRect trimRect = trimRectFromImageByAlphaValue(image, 255);

             NSImage *trimImage = trimImageByRect(image, trimRect);

             // trimRect内の影を透明にする

             NSImage *transparentImage = transparentImageByAlphaValue(trimImage);

             // 影付きイメージを生成する

             NSImage *shadowImage = dropshadowImage(transparentImage, blurRadius, alphaValue);

             // PNG画像として保存する

             saveImageByPNG(shadowImage, shadowPath);

             // 画像情報を出力する

             NSRect align = [shadowImage alignmentRect];

             NSLog(@"%@ (%f, %f, %f, %f)", shadowPath, align.origin.x, align.origin.y, align.size.width, align.size.height);

         }

     }

     return 0;

 }
- 以上のコードを追加して、ビルドして試してみた。
| 元画像 | dropshadow |
|---|---|
 |
[ .5] .5] |
やった!丸いウィンドウの影も自在にコントロールできるようになった!
晴れて dropshadow コマンドは、影の達人になったのである。嬉しい!
ダウンロード&インストール&使い方
- もはや影を自在にコントロールできるようになったのだから、dropshadowではしっくりこない。
- よって、プロジェクト名・コマンド名とも改め、「shadow」とした。
- プロジェクトの中にビルド済みのshadowコマンドも含めた。
- command/shadow
- 使い方は以前のdropshadowコマンドと同じ。
